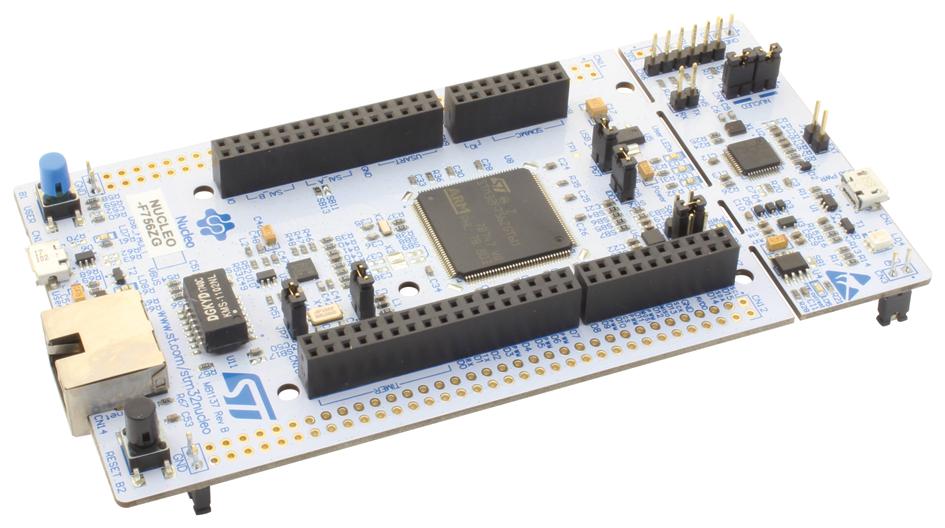
This is an STM32F756ZG Nucleo-144 development board.
When I first started playing with it, I was disappointed by most sources telling you to simply use the STM32CubeIDE (or similar). I don’t think you’ll actually understand anything about embedded development by using those tools to learn (although they could absolutely be helpful for development speed - but that’s not what we’re here for).
This guide is mainly for the STM32F7 series, but there’s really no reason why you couldn’t also use it for other boards with some minor tweaks!
This guide is adapted from cpq/bare-metal-programming-guide, with lots of opinionated changes.
What you’ll need
- An STM32 (duh)
- A PDF copy of your STM32’s reference manual, user manual, and programming manual
- Micro-USB to USB-X cable (X = whatever plugs into your development computer) - making sure the cable supports data transmission
- A working
arm-none-eabi-gccinstallation (see here) - A working
stlinkinstallation (see here) - A working
cmakeandninjainstallation (see here and here)
The USB cable will let us flash our program onto the memory via the built-in ST-Link v2 hardware on the development board. As for the software:
arm-none-eabi-gccis a GNU compiler toolchain specialised by Arm to target embedded ARM processors (like the one we have on the STM32). We can’t just use any old C compiler.stlinkis a handy little CLI utility to flash data over the USB ST-Link connection into our STM32 memory.cmakeis a meta-build generator, andninjais a build system. In other words, we’ll be using CMake to generate Ninja build files.
Make me a CMake
You don’t need to be a CMake expert to get this set up; I’ll explain as I go along. It’s a fairly simple language: Pretty much everything is based around stringly-typed variables and functions.
Firstly, we need to create a folder for our project to live in. This can be located anywhere, and at some point you’ll definitely want to push this to a remote Git repository.
Inside that folder, we’ll need a file called CMakeLists.txt, which describes our meta-build steps (CMake reads those build steps and generates an actual build file which we can execute with Ninja).
At the top we’ll need some small setup:
cmake_minimum_required(VERSION 3.16)

# always use the ARM GCC compiler
set(CMAKE_C_COMPILER arm-none-eabi-gcc)
set(CMAKE_CXX_COMPILER arm-none-eabi-g++)
set(CMAKE_ASM_COMPILER arm-none-eabi-gcc)
set(CMAKE_SYSTEM_NAME Generic)
set(CMAKE_SYSTEM_PROCESSOR arm)
set(CMAKE_C_COMPILER_FORCED TRUE)
Here we’re simply specifying a minimum version of CMake that can run this script, and that our project will always compile with the arm-none-eabi-gcc compiler. CMake isn’t really aware of this cross-compilation toolchain we’ve set up so we just say that it’s a “Generic” system and that CMake shouldn’t try to verify whether the compiler works, like it usually does (CMAKE_C_COMPILER_FORCED).
There are also a set of compiler flags we’ll need in order to configure the compiler to produce a binary that our STM32 will like:
set(ARM_FLAGS
    -mcpu=cortex-m7     # target the ARM Cortex-M7 CPU
    --specs=nosys.specs # no system calls!
    --specs=nano.specs  # use newlib-nano (really slim libc)
    -nostdlib           # no stdlib luxuries here!
)
Right now ARM_FLAGS isn’t being used anywhere, it’s just a variable we made up, but it’ll come in handy later.
Now we can declare our project - for which we’ll only be using the C and Assembly language:
project(stm32 C ASM)
If you wanted to use C++ in your project, you would also add CXX in there.
Next we’ll want to configure the linker, which is the program that runs after compilation that “links” all the different parts of your program into one binary file. We can’t rely on the linker to lay out the program data correctly in memory, as the STM32 has very specific requirements about where everything needs to be. I implore you to look at the bare-metal-programming-guide I mentioned at the start to learn about the specifics of this, but essentially we’ll need a linker script in our folder (in this case, mine is STM32F756ZG.ld, we’ll write that file later) that our linker should use:
# use linker script
set(LINKER_SCRIPT "${CMAKE_CURRENT_SOURCE_DIR}/STM32F756ZG.ld")
set(CMAKE_EXE_LINKER_FLAGS "${CMAKE_EXE_LINKER_FLAGS} -T ${LINKER_SCRIPT}")
Now we need to declare that we want to build an executable binary. If you’re playing with the STM32, you’re probably going to be making a bunch of different little programs independent of each other, and it would be pretty annoying if you had to copy-paste the build configuration for each one. So instead, we’ll make a helper function in CMake that will create and configure an executable target:
# helper function to set up a target
function(add_program PROGRAM_NAME FILES)
  # build an executable from the source files (FILES)
  add_executable(${PROGRAM_NAME} ${FILES})
  # include the src/ directory
  # so that we can do #include "something_in_src.h"
  target_include_directories(
    ${PROGRAM_NAME} PRIVATE
    ${CMAKE_CURRENT_SOURCE_DIR}/src)
  # give the ARM_FLAGS we made to the compiler
  target_compile_options(
    ${PROGRAM_NAME} PRIVATE
    ${ARM_FLAGS})
  # also give the same ARM_FLAGS to the linker
  target_link_options(
    ${PROGRAM_NAME} PRIVATE
    ${ARM_FLAGS})
  # rerun the linking step if our linker script changes
  set_target_properties(
    ${PROGRAM_NAME} PROPERTIES
    LINK_DEPENDS ${LINKER_SCRIPT}      # relink if linker script changes
    OUTPUT_NAME  "${PROGRAM_NAME}.elf" # *.elf out
  )
  # run objcopy to turn .elf into .bin (i.e., a big blob of firmware)
  add_custom_command(TARGET ${PROGRAM_NAME} POST_BUILD
    COMMAND arm-none-eabi-objcopy
    ARGS -O binary ${PROGRAM_NAME}.elf ${PROGRAM_NAME}.bin
    WORKING_DIRECTORY ${CMAKE_CURRENT_BINARY_DIR}
    COMMENT "Forming binary blob ${PROGRAM_NAME}.bin"
    )
  # helper target to flash bin to STM32
  # this is where we use stlink!
  add_custom_target(flash-${PROGRAM_NAME}
    COMMAND st-flash --reset write ${PROGRAM_NAME}.bin 0x8000000
    WORKING_DIRECTORY ${CMAKE_CURRENT_BINARY_DIR}
    )
endfunction()
One last thing we need to do is actually write the linker script I mentioned (in this case, STM32F756ZG.ld):
ENTRY(_reset_handler);

MEMORY {
    flash(rx) : ORIGIN = 0x08000000, LENGTH = 1024K
    sram(rwx) : ORIGIN = 0x20000000, LENGTH = 192K
}

/* SBP at end of SRAM */
/* stack grows downwards! */
_estack = ORIGIN(sram) + LENGTH(sram);

SECTIONS {
    .vectors : { KEEP(*(.vectors)) } > flash
    .text    : { *(.text*) }         > flash
    .rodata  : { *(.rodata*) }       > flash

    .data : {
        _sdata = .;
        *(.first_data)
        *(.data SORT(.data.*))
        _edata = .;
    } > sram AT > flash
    _sidata = LOADADDR(.data);

    .bss : {
        _sbss = .;
        *(.bss SORT(.bss.*) COMMON)
        _ebss = .;
    } > sram

    . = ALIGN(8);
    _end = .;
}
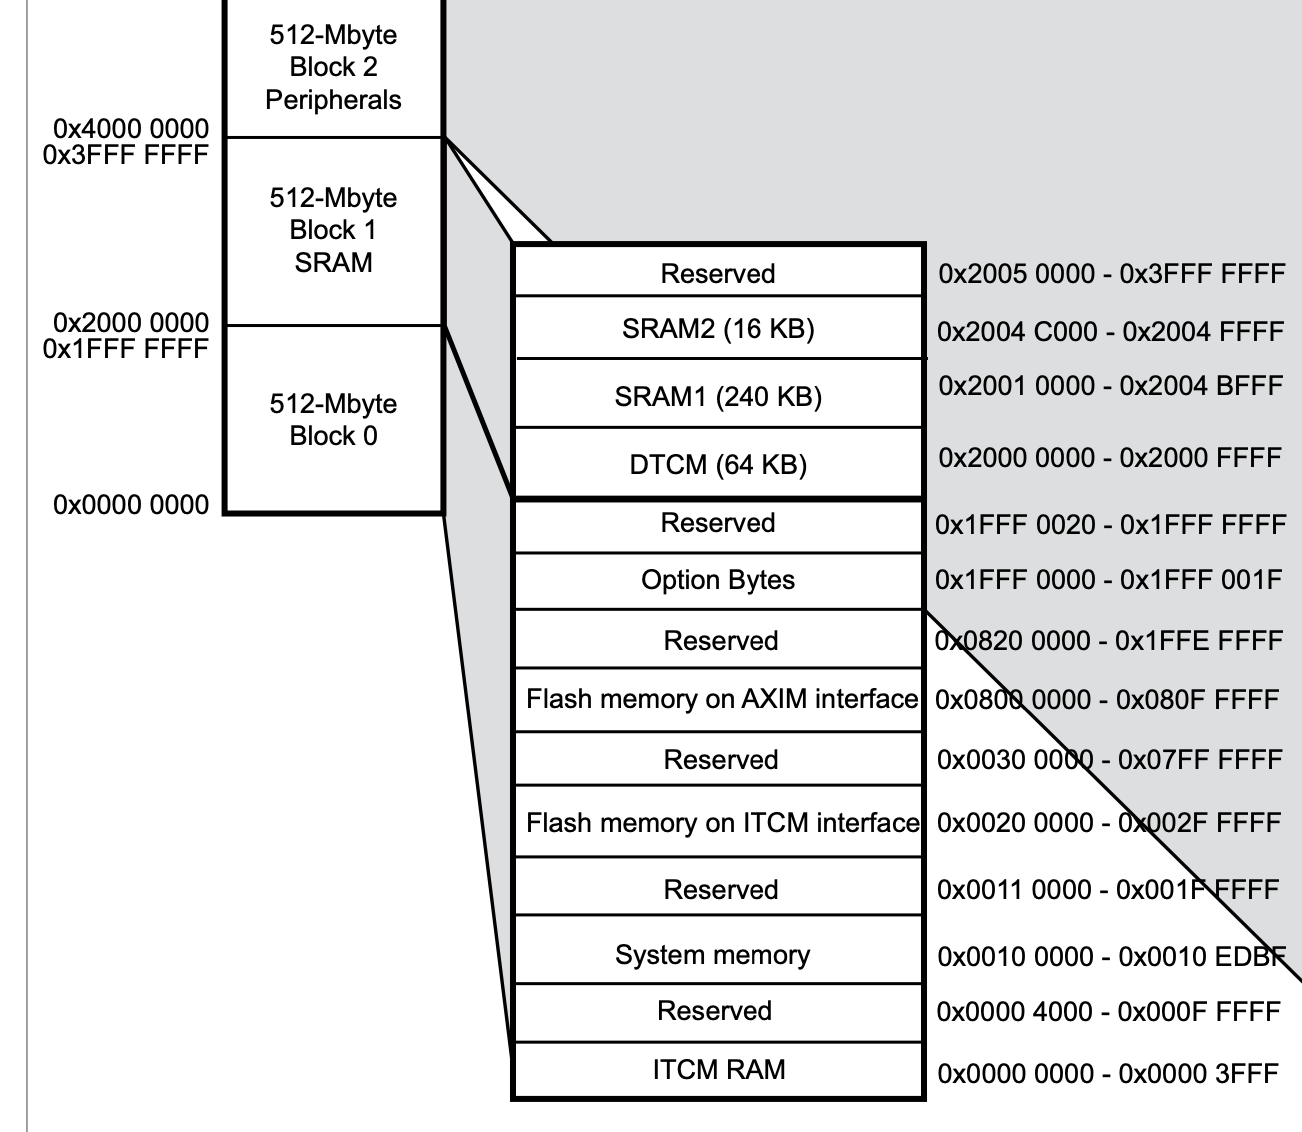
This may all seem a bit like magic, but it’s important you understand: Our STM32 likes everything in specific places, as we can see from the reference manual.

Comparing that diagram to our linker script, we see that:
- Flash memory starts at 0x08000000 (“Flash memory on AXIM interface”)
- SRAM starts at 0x20000000 (“512-Mbyte Block 1 SRAM”)
The very first two things in our flash memory is .vectors, which will contain our initial stack pointer, _estack, and our reset handler function address, _reset_handler (which will essentially act as the entry-point).
C!
In our project folder let’s create a sub-folder called src where our source files will live. For now we’ll just create a file called setup.c - which will do nothing but the most minimal setup.
setup.c will look like this:
int main(void)
{
    /* your program will go here */
}

__attribute((naked, noreturn)) void _reset_handler(void)
{
    /* defined by ld */
    extern long _sbss, _ebss, _sdata, _edata, _sidata;
    for (long* p = &_sbss; p < &_ebss; ++p)
        *p = 0;
    for (long *pdst = &_sdata, *psrc = &_sidata; pdst < &_edata;)
        *pdst++ = *psrc++;

    main();
    /* loop forever */
    for (;;)
        (void)0;
}

/* extern decl for vtab */
/* takes places of initial stack ptr */
/* see linker script */
extern void _estack(void);

/* vector table of our function pointers */
__attribute__((section(".vectors"))) void (*const vtab[16 + 91])(void) = {
    _estack, _reset_handler
};
So there’s a lot happening here. Let’s break it down.
The STM32 has a bunch of “handlers” that it can invoke. These can handle interrupt requests, or faults, or in our case, resets. The CPU knows what handlers to invoke by consulting the .vectors table.
We use GCC-specific attributes naked and noreturn on our reset handler to indicate that:
- Do not include a function prologue/epilogue. If you’ve ever looked at Assembly code, you’ll notice that every function is preceded by a few instructions, and then followed by a few instructions. This is for pushing and popping to the stack and helps keep track of a few registers as we jump into and out of function calls. In this case, we do not need them.
- This function will never return (as we can see from the endless loop).
Dissecting the body of _reset_handler;
- The
.datasection (see the linker script) is all our global variables that need to be initialised with data. In this case, that data is located in flash memory along with our program, but we need that data in SRAM to actually use it! Hence we copy them over byte-by-byte in a loop. - The
.bsssection is all our global variables that need to be initialised to zero. Similar to.datawe copy it over to SRAM, but in this case we just need to copy zero into that memory.
At the bottom we have a variable declaration named vtab, which is our vector table that is going to be explicitly placed in the .vectors section, thanks to the attribute. This lets us initialise the vectors table with the data we want (_estack followed by the _reset_handler function address).
Great! Now we can build and flash this program. To build it, we can go back to our CMakeLists.txt and at the bottom add:
add_program(setup "src/setup.c")
To avoid messying our project folder, we’ll create a separate folder inside our project folder for all the build files:
mkdir build && cd build
Then generate our Ninja build file:
cmake -G Ninja ..
And finally, build:
cmake --build .
You should see a setup.bin file appear in the build folder. We just need to flash this to our STM32 now. Thanks to the powers of our CMake configuration, we can flash it via Ninja:
ninja flash-setup
Et voila! Your program should now be flashed to your STM32 and will do absolutely nothing. The next thing you need to do is crack open your PDF manuals and figure out how to blink that LED. Some hints:
- The user manual will specify which pin corresponds to which LED
- The reference manual will specify the memory addresses for each pin group, and the registers under each pin group
- You’ll need to enable the clock for the pin group via RCC in the
RCC_AHB1ENRregister